Traditional publishing
Preparing project
This section explains the process of publishing QGIS map project. It is
assumed that QGIS Desktop is installed on the
user device and so is the Gisquick plugin in QGIS. This can be done in
Manage and install plugins inside Plugins tab. Type the plugin
name into search bar and install it.
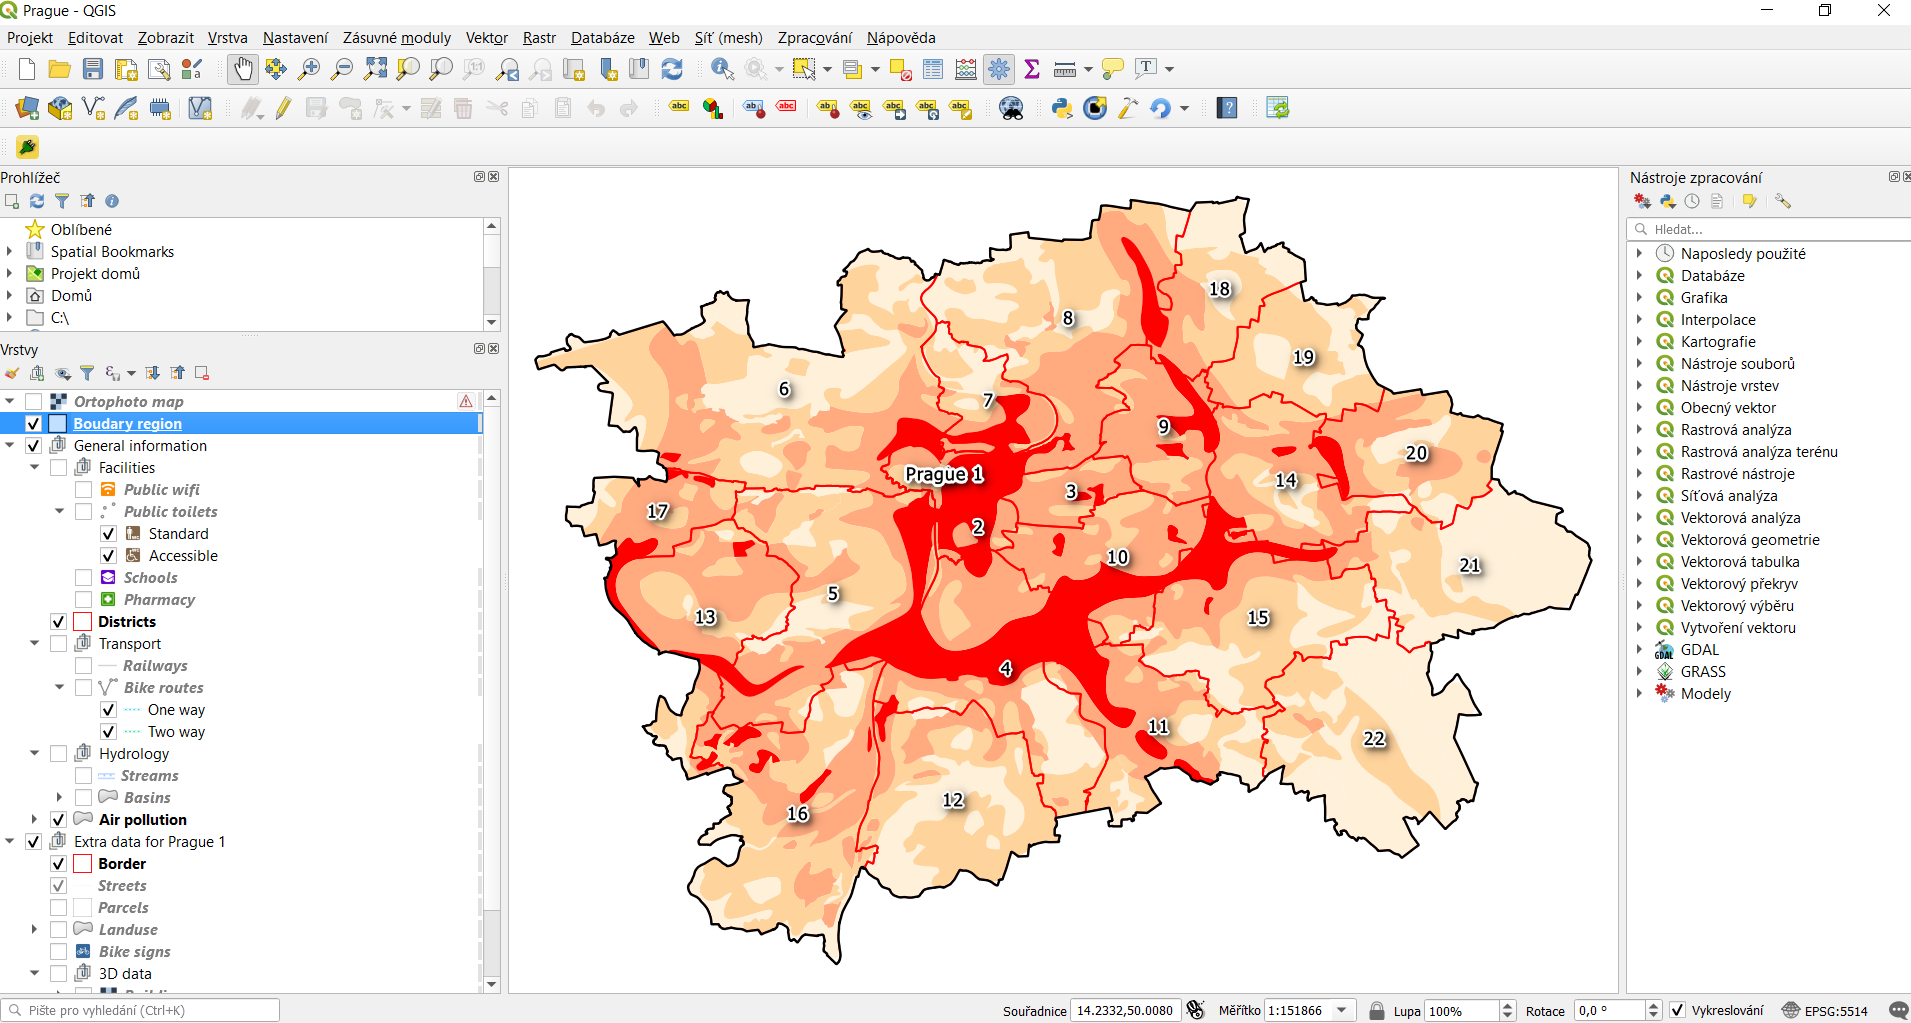
QGIS project dedicated for publishing is prepared in the standard way. Map layers can be combined from various data sources like flat files (Esri Shapefile, OGC GML), file-based databases (OGC GeoPackage, SQLite, SpatiaLite), server-client databases (PostGIS) or OGC Web Services (WMS, WFS, WCS).
Before publishing project using Gisquick plugin, the project must be saved in QGS format (QGZ format is currently not supported by the plugin).
Important
 When using flat files or file-based databases as
data stores it is strictly recommended to save all the files (data and QGIS
project) in the same directory. QGIS project must be set up to use
relative paths (see Project Properties).
When using flat files or file-based databases as
data stores it is strictly recommended to save all the files (data and QGIS
project) in the same directory. QGIS project must be set up to use
relative paths (see Project Properties).
When using any kind of authentication (databases, web services) it must be ensured that server used for publishing will have access rights to such data sources.
Publishing QGIS project will be demonstrated on the Prague sample
project downloadable as a zip file. At
first, sample prague.qgs QGIS project is open in QGIS
Desktop. Before doing any changes the project will be published as it
is.
The publication process is started by Gisquick QGIS plugin
![]() . The plugin is designed as a wizard to simplify publishing
process as much as possible.
. The plugin is designed as a wizard to simplify publishing
process as much as possible.
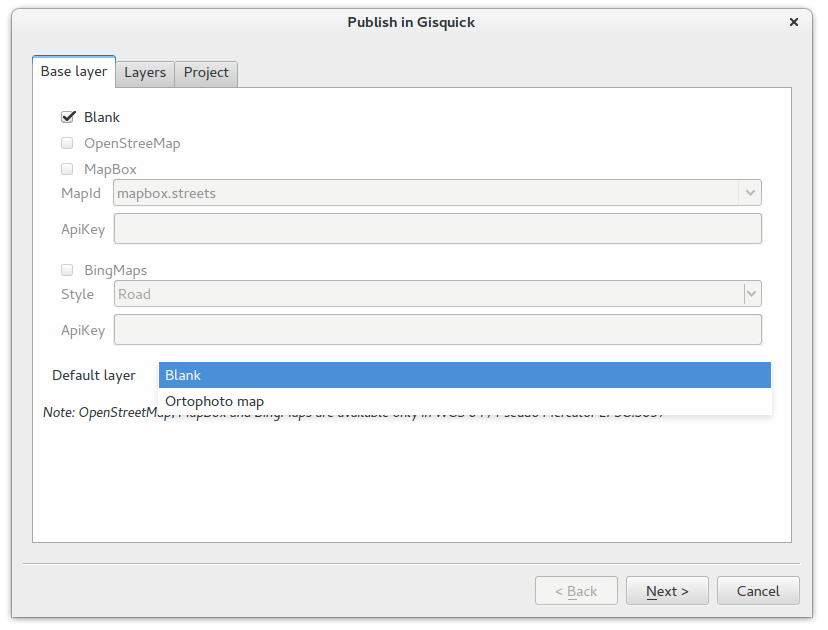
First page of the wizard allows defining basic settings for publishing:
base layers,
overlay layers and
basic project metadata.

By base layers are meant typically WMS layers provided by QGIS
project. The Base layer sub-page also allows adding base layers provided by
external services like OpenStreetMap, MapBox or Bing.
Important
External base layers are available only when QGIS
project is using WGS84 Pseudo Mercator projection (EPSG:3857).
Here also default base layer can be defined, see figure below.
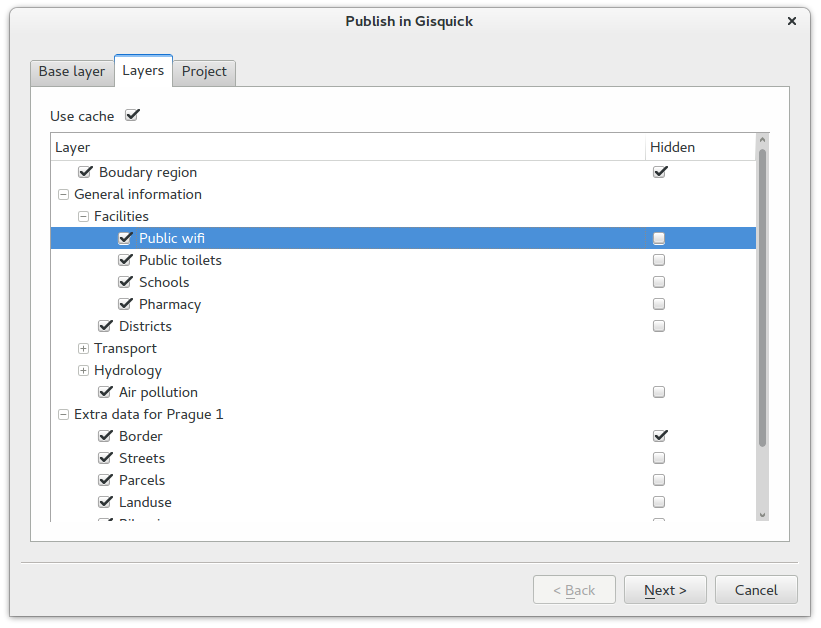
In the second Layers sub-page is controlled, simply by
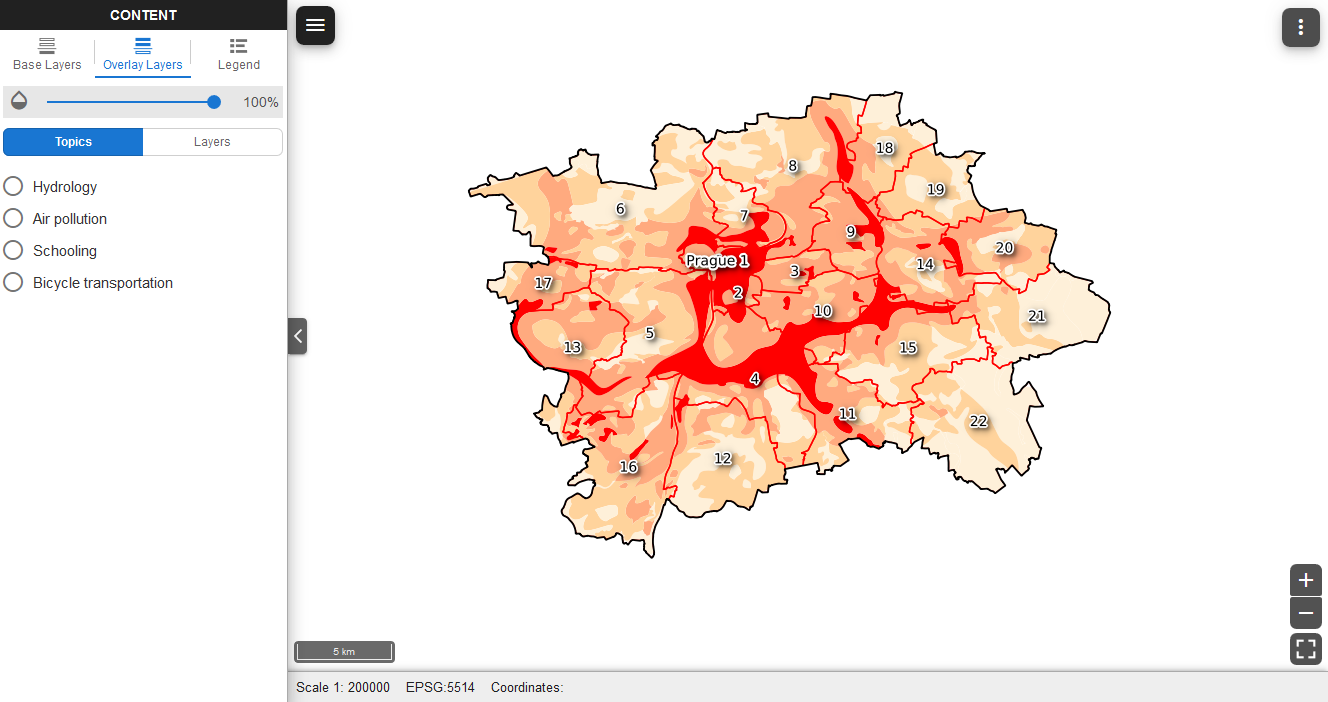
checkboxes, which map layers will be published. It’s also possible to
publish layer as hidden (ie. not shown in Overlay layers tab, see
User interface section). Top left checkbox Use cache
controls usage of QGIS Server map cache. By default, map tiles are
cached by QGIS server and re-used when possible.
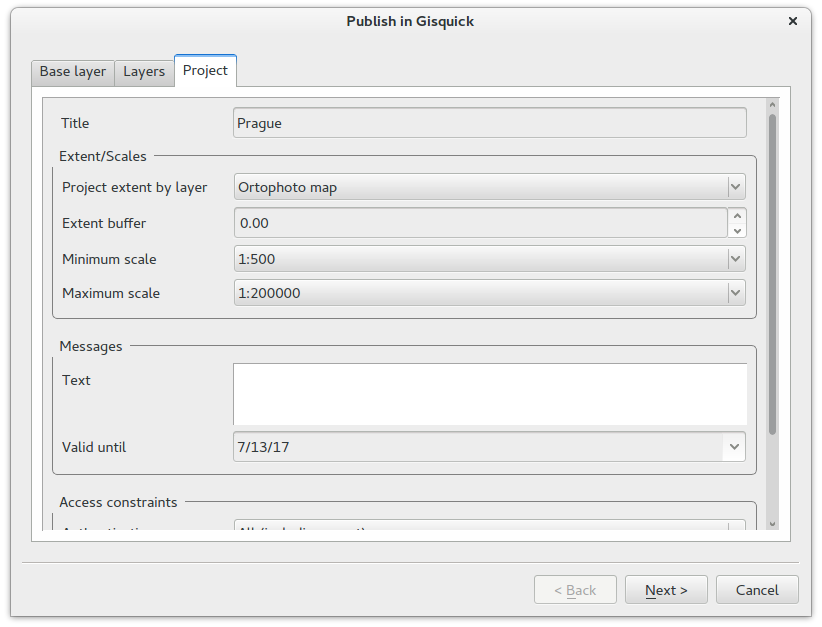
The last Project sub-page allows defining basic project metadata
like title, extent, min/max scales, info message, access constraints,
etc.
In the following page topics can be defined. By topic it’s meant
a group of thematically-related overlay layers. Topics can be easily
switched in Topics tab of Gisquick UI, see
User interface section. Layers which
should be part of a defined topic are simply checked. Topics can be
added or removed by buttons located in the bottom left part of the
dialog. Each topic has defined a short description (abstract) which is
shown by Gisquick UI.

Last but one page shows a read-only configuration summary. It’s the last
chance to go back by Back button and change publication settings.

On the last page are displayed files need to be transferred to the
Gisquick publication server. The result of publication process is two
generated files: timestamped QGIS project (.qgs) and metafile
(.meta). These files together with project data (see Data
sources) must be transferred to the publication server.
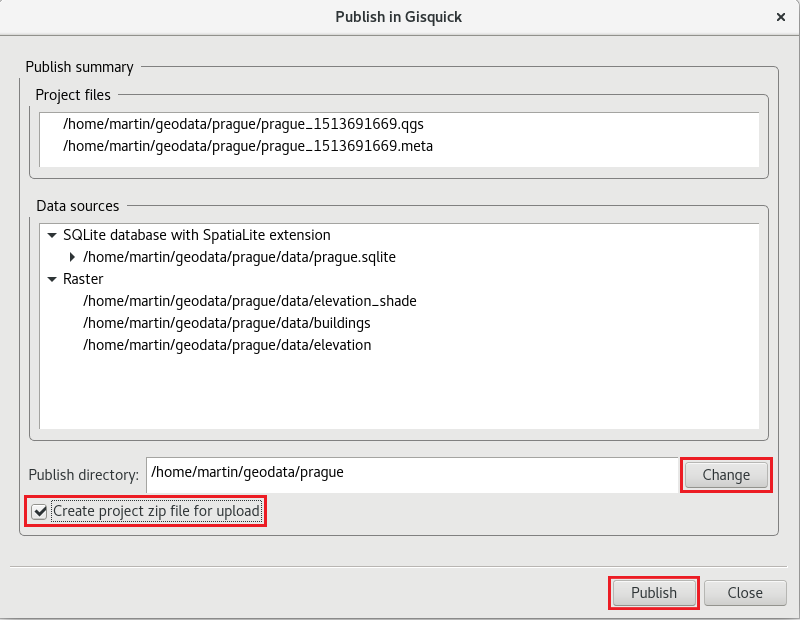
When Publish button is pressed, the unique project file name with
timestamp together with its metafile is created. By default,
timestamped files are created in the same directory as the original QGIS
project. Optionally the destination directory can be changed by the
Change button. In this case, data source files are also copied to
the newly defined directory.
The published project together with data can be optionally zipped into an
archive, which can be easily uploaded to the publication server, see
Create project zip file for upload option.
Uploading project
In the next step, user can upload a prepared project zip file created
by Gisquick plugin as described in the section above. Login to your
publication server account. In the user menu go to My profile
(see User profile page for details).
Go to Upload project, enter the project zip file and upload the
file using the Upload button.

After successful upload go to My Projects and find your first
published project.

At this stage, it is possible to view the project in Gisquick by clicking the blue icon in the second column. However, it is recommended to finish the setup following the chapter Releasing project.